Disclaimer: The links within this article contain affiliate links from which I will receive a commission from any purchase you make.
Starting a successful blog is not a day job, as people think. Whether you want to showcase your skills, launch your brand or create an income stream, blogging remains one of the best ways to get online.
But the good thing is that you don’t need to be teach savvy to get started.
In this guide, I’ll walk you through step by step to start a profitable blog on HostGator, even if you’re a beginner.
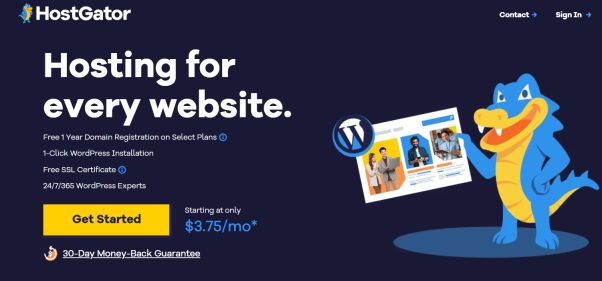
HostGator is one of the best web hosting services, known for its affordable pricing, ease of use and better performance.
If you want better hosting to launch your WordPress blog quickly with one-click installation, then HostGator is a better option among the best web hosting companies.
By the end of this HostGator tutorial, you’ll know how to:
- Choose the best HostGator plan
- Get a free domain name for your blog
- Install WordPress on HostGator
- Customise your blog
- Publish your first blog post
With this HostGator blog guide, you can launch your blog with confidence and start building your presence online.
Sign up on Hostgator starting at $2.75/ month
What You Need to Start Your Blog on HostGator
Before you start a blog on HostGator, it is essential to all the necessary thing on ground.
Choose A Profitable Blog Niche
The first thing to choose is a blog niche.
Some profitable blog niches are:
- AI and automation
- Digital marketing
- finance
- Health and fitness
- Tech and software
- Personal development
- Making money online
- Travel
- DIY
Choose a topic based on interest, experience and what people are searching for online. This increases your chances of success.
A Domain Name
Your domain name is the address of your blog on the internet.
For example, bestblog.com. To host your blog on HostGator, you get a free domain during the signup process for one year.
Make sure you keep it short and easy to remember, and avoid numbers and hyphens. Ensure it relates to your chosen niche
Top 5 Passive Income Ideas to Make $5000 a Month
Register a .com extension, if possible, as it is still the best domain type for business.
Web Hosting (HostGator)
HostGator WordPress hosting includes:
- One-click WordPress installation
- Free SSL certificate
- 24/7 customer support
- Low-cost plans for new bloggers
How To Start A Blog With Hostgator
3 Things To Become A Successful Blogger
Setting up your blog properly
You are going to learn exactly how to create a WordPress blog, which can be done from any computer, tablet, etc. WordPress is the most popular blog platform at present. In this step-by-step blogging tutorial,
I am going to show you PRECISELY how to create a successful blog and configure WordPress so that you get the best out of it.
Having a passion for your topic
What is a blog? Blogging is a way of sharing your knowledge with the world. Choosing a topic you are passionate about makes the process of creating a successful blog so much faster and easier. So what is your passion?
Learning from others
I am not ashamed to admit that when I first started learning how to create a blog, I made a lot of mistakes. You can benefit from more than seven years of my outstanding experience so that you will avoid such mistakes.
Why Do You Need To Start A Blog?
- Make income
Blogging can be very profitable if done properly. Most of the top bloggers in the world earn a certain amount of money, but even a part-time blogger can expect to make a good profit if things are set up correctly.
- Recognition
Most of the top bloggers today are known through their blogging experience if no one will even hear about them. They write a quality blog post that helps newbies and others to achieve their goals and get shared by thousands of people.
A successful blog can gain you a LOT of recognition in your respective field. Many bloggers are known as professionals or experts just because of their blogs. Who knows, you may be the next one.
- It’s Fun!
Blogging is fun and is a great way to expose your ideas to those who need them and share what you love to do with them. There is nothing like helping-minded people who need certain information to achieve a simple task.
Getting Started – Create a WordPress blog With Hostgator
WordPress is very secure and constantly updates its software, so there’s hardly any worry of having your blog attacked by a hacker. No wonder companies like Sony, NASA and even most university blogs are using WordPress platforms to build their website.
It’s HIGHLY customizable. There are thousands of free themes and plugins that add more functionality to your website without spending any money.
While the other blogging platforms are generally all pretty great, nothing, in my view, has ever come close to the freedom and customisation options that WordPress offers bloggers. So, without a doubt, go with WordPress.
Why Avoid Free Blogs?
As a blogger, you have many options for setting up a blog for free on different websites. This sounds great, but there are some huge disadvantages to using a free blog site:
Problem #1: Free
They won’t get enough blog space. Instead, they make money off of the time and hard work you invest in writing your blog by selling your ad space.
You have no absolute control over what is being advertised on your blog, and you will not get a penny of the money they get from selling this ad space.
Problem #2: No total control
Free blog sites don’t give you FULL access to the range of features you need to become a successful blogger. In the step-by-step tutorial on how to make a successful blog, I show you some tips and tricks you can use to optimise your blog completely. Unfortunately, most of these things can’t be done on a free blog site.
Problem #3: Poor security
The truth of the internet is that, at times, sites get hacked. If this happens to you when using a free blog provider, the hacker can steal your domain name, which means that you will lose your entire site and may find it challenging to get it back.
Blogging for beginners
Start a Blog With Hostgator
So, I strongly recommend that you stay far away from free blogging sites. It is just not worth the risk and hard work, no matter what type of blog you are creating.
The great news is that buying your domain can prevent all of these issues, and it is inexpensive. The cost is even cheaper than a “free” blog because there are no hidden fees.
In the step-by-step tutorial on this blog, I will show you my method, which costs less than $4 per month to host your blog.
Start With A Self-Hosted Blog
To create a successful blog, you need to start with a self-hosted blog on your own domain from day one. Setting up a blog with a self-hosted is an easier way and less expensive than you think.
The whole process of getting your blog set up and ready should only take you about 20 -25 minutes.
Before you can start blogging, you need two things:
- Pick a domain name.
- Web hosting
Start a blog with HostGator. Step 1:Choose a domain name
This is a very important aspect; you need a good domain name for your blog for people to find your website online.
Finding a domain name and a Web hosting provider
Domain name – This will be your blog address, where people locate you repeatedly. For example, my domain is www.entrepreneursclass.com. Your new blog domain name may be www.Yourname.com.
You will need to choose a name that is unique and very descriptive, so your readers will immediately know what your blog is all about. Alternatively, you can use your own name. For example, www.Johncow.com. You can also add your middle name if your name is taken.
My preferred Domain Register
Several top bloggers use their own name as their domain name. This has the additional benefit of preventing someone else from registering your name.
Once you have a good domain name, you will need to select a domain extension. The best extension is .com, but .net and .org work very nicely as well. I would advise you to stay away from other extensions, such as .us .info or .biz, as they are not as familiar to some people.
If you find out that your desired domain name is already registered, you can try adding simple words like “the”, “best”, or “the best” to the beginning of the name, or you can try including dashes between words such as the-best.com.
Click here to read more on how to choose a good domain.
The cost of a domain name is just $10/year, or even less. There are many domain registrars online where you can register your domain, but I will show you how to register your domain in less than one minute
Start a blog with HostGator. Step 2: Choose Web Hosting
A web host is a company that hosts all of the log files and delivers them to the user when they type in your blog name. Standard web hosting is a must in order to have a blog.
Registering with a bad host will doom your blog from the start. Visitors will be frustrated with slow page loading times and you may often find that your blog is simply not working at all which may be annoying your visitors not to visit your site again.
There are hundreds of different web hosts you can choose from, but my recommendation for your blog is Hostgator. HostGator is the web host I used for all my blogs, including Entrepreneursclass.com, before I moved to SiteGround.
This is for a few reasons:
- Hostgator offers a free, simple installation of all the popular blogging tools, including WordPress
- WordPress recommended HostGator some years back and currently hosts over 2 million websites.
- They offer effective 24/7 customer service via email, phone, or web chat.
- They offer a money-back guarantee in case you are not satisfied for any reason.
- Hostgator is a top-quality web hosting that costs a bit more ($4.99 per month) than low-quality hosts.
Click here to sign up with Hostgator and save 60%
If you have any trouble setting up your blog with my tutorial, just contact me, and I will do it for you without paying a dime. Hostgator rewards me when you purchase through my link, so my services are free of charge!
Start a blog with HostGator. Step 3: WordPress Setup
What To Learn:
- How to sign up for Hostgator Account
- How to add a new domain to HostGator
- How to install WordPress on HostGator
Installing WordPress on Hostgator only takes two minutes, to get started, you need to sign up on Hostgator to get login details.
1. Click here to sign up on Hostgator to get 60% off
When the new page opens, Click on get started as seen in the image below.
- Select your plan. The Hostgator Hatchling plan is the one I recommend for a new blogger. Click “Sign Up Now” to choose your plan.

NOTE: If you only want to install more than ONE domain, then click on the second package which is $5.95/month. You will get FREE SSL Certificate with this plan.
Step 3-Type in your domain name in the left box and then click “next” to see if it is available.
If you have a domain name already and want to use it for your new blog, type your existing domain in the right box where you have ‘’I Already Own This Domain” and then click “next”.

But if you just want to register a new domain, then click on ‘’Register a New Domain’’ Only use the right box if you have a domain registered.
Make sure you have registered your domain before with Namecheap.com
Once you have added your domain name to HostGator, then the next step is to choose your hosting plan under Billing Cycle.
Step 4. You need to choose your HostGator hosting package and options
There are many options but I preferred one is 36 months plus 40.20 % off but 12 months plus 25% off or 24 months plus 36.53% are also good choices.
NOTE: You can also choose to be paying every month if you can not avoid 12 or 24 months.

Type your username and enter the four-digit number in the column

Step 5: Enter Your Billing Information.

Step 6: I unchecked all the boxes when I sign-up.You can check Secure and Accelerate your site to protect fraud etc. Also, you can add them later if you need them but now make sure you unchecked them.

Step 7: Check I have read and agree to the terms of service, then click CHECK OUT NOW!

NOTE: The amount you will pay depends on the PLAN you choose.
Step 8: Once your account is set up (usually just a few minutes), you will be sent the login details into the email account you provided when you are signing up. The information will contain your billing login details, control panel login details and nameservers.
The details will look like these:
You can log in to our billing system at http://gbclient.hostgator.com/login, using the email address we sent this email to, and the password i0YPi0bRV
- Shared Plan: Baby
- Your Control Panel: https://gator2041.hostgator.com:4089
- Username: blogtreqa1
- Domain: theblogging.net
- Password: vuevv2313
- 1st Nameserver: nbe65041.hostgator.com2nd Nameserver: nbe5044.hostgator.make sure you check your email and all the information will be there.
If you register your domain with any domain registrar such as NAMECHEAP, you need to point it to the Hostgator server before you can install the blog.
Step 9: Pont Your Domain Into Hostgator Server.
Go to namecheap.com, on the dashboard, and click on Manage in front of the domain you want to configure.

Then locate the NAMESERVERS at the left-hand side and select CUSTOM DNS.

Copy the Hostgator name server and paste it in the space as shown above. There are TWO nameservers, the first one on the first line and the second on the second line and click save.
Step 10: Log in to your control panel through the link provided by HostGator with username and password.
Example:
Link: https://gator2041.hostgator.com:4089, then enter your username and password.
Step 11: Now that you have logged in to your control panel account, we can easily install WordPress. First, make sure you close any pop-up windows if there are any. Then look around at the top of the control panel and locate “Get Started with WordPress Today”.

You will now be logged in to Mojo Marketplace automatically and directed to the WordPress install page. Click on the “Install WordPress” button to get started.

Select your domain from the drop-down menu and fill the space”.
- Admin email: Your email address
- Blog Title: The title of your blog
- Admin user: Your username
- Name: Your first and surname

NOTE: Leave the space in front of your domain that says install/path/here empty.
After filling in all the spaces, click on Install WordPress.
Once you click on install WordPress, it may take up to 3 minutes to install. After the installation is complete, you will see the message that your installation is complete.

On the left side, click view credentials to get the login information to the dashboard of your blog. This will also be sent to the email you provided during the installation.
Check your email and locate quick-install. You will see all the login information there.
Sign in to your new blog and check it. To log in, click the admin URL like this www.myblog.com/wp-admin. (where “my blog” is your domain name) Then insert your username and password.

Congratulation you have completed Hostgator WordPress Setup, and your blog is live.
Having trouble installing your blog? Get help here
This is how to start a blog on HostGator. As you can see, it is very simple, with no stress.
Start a blog with HostGator. Step 4: Customise Your Blog
Now that your blog is live, it is time to customise it to make it look attractive. I have put together a step-by-step guide to customise your blog.
Here are the steps to customise your blog.
Install a premium WordPress theme. One of the best WordPress themes you can use for your blog is GeneratePress theme. It is very light and easy to customise.
And if you want to use a free theme, you can check the WordPress.com theme section. There are thousands of free themes you can find there.
Install Plugins
Plugin make it simple to customise your blog and make it look more attractive. There are free and paid WordPress plugins; it depends on your choice. Below are a few important plugins to install on your new blog.
- Security plugin
- SEO plugin
- Spam block plugin
How To Start a Blog On Hostgator: Conclusion
Starting a blog on HostGator is the best way to start making money online by monetising your blog.If you launch a blog to make income online, you can start seeing results within three to five months.
With HostGator’s affordable hosting, beginner-friendly and one-click WordPress installation, the web hosting platform makes the blogging process easy, even if you’re just starting.
This is a perfect time to start a blog. HostGator gives you all that you need to launch quickly and grow your blog to start making money
Now, your blog is LIVE on Hostgator. There are more things to do to make it profitable. You need to learn how to write SEO articles that can rank on Google and other search engines.
Also, it is crucial to promote your blog to drive traffic to it and probably to any offer you’re promoting. Blog monetisation is essential to ensure you are making money from your efforts.
HostGator Alternatives
There are many web hosting services similar to HostGator, and some even have more reputable and popular ones that you may want to check.
WPX hosting service: One of the best WordPress hosting providers for high-traffic websites/blogs.
Chemicloud web hosting: Another greate wordpres hosting provider that is worth it. I hosted all my blog and they are amazing web hosting.
SiteGround web hosting: I love SiteGround, and I have used them to host my blog before migrating to the Chemicloud hosting service.
Related Post
- How to start a blog
- Best web hosting for small business
- How Do Bloggers Make Money
- How to Start a Review Blog And Make Money
- Freedom Accelerator Review
- The Traffic Syndicate Review:
Oyundoyin Anthony is a blogger and an affiliate marketer that offers helpful contents to people who are looking for different products for their needs. He enjoys helping people to achieve success in their business.
Uh hi ya! Umm I kinda need a little help with the last part. See I installed WordPress.. went to the email to see link sent.. clicked on the link to my website but it says error. Refused to connect and didn’t send data..? Why I wonder
Was it the link to sign in to the dashboard? Can I see the link?
It was both urls to my site and admin login. I had to connect my nameservers(on HostGator) to my domain (on namecheap). Problems solved and now my site is live!
Congrats Kiara.